Monday, May 12, 2014

Integrating iPad Use Across the K-8 Library Curriculum, by Katherine Hlousek, Emiliano Zapata Academy Librarian

As the school year quickly comes to a close and time is limited, I have been reflecting on how I have used iPads as well as projects I would like to explore for the next school year. During the fourth quarter I have increased iPad use for project creation - creating book trailers with seventh grade, comics with sixth grade, digital posters with fifth grade, and digital timelines with fourth grade. As I have many projects going with different grades, I have found that frequently projects have taken much longer than I initially planned – either due to extra research time, a learning experience with technology, or changes in the library schedule. I have also come to a realization that it is okay to use the iPads and a specific app for a succinct one class period lesson. I have started to recognize that every lesson with the iPad does not need to yield a grandiose final product, rather the learning experience is the key element.


During the fourth quarter I wanted to increase technology integration and use with the primary classes I see in the library. I began integrating iPads for short term (one or two class periods) learning projects with third grade classes and stations with first grade classes. First grade students rotate to an iPad station and use a specific app that corresponds with the lesson’s informational read aloud. Third grade students work in cooperative learning pairs or trios to complete an analysis activity using the iPads.                


First grade students used iPads as a station following a lesson on symmetry.  I introduced symmetry, showed students examples of symmetrical objects (triangle, butterfly, certain letters, etc.), and read aloud Seeing Symmetry, by Loreen Leedy. Following the

read aloud and a review of the topic, I introduced the symmetry stations.  Stations 1 and 2: These two stations had numerous examples of symmetrical objects. Students identified the line of symmetry on each object or folded objects along the line of symmetry to further explain that both halves of the object are mirror images of the other half. Station 3: At this station students created symme-trees by folding a piece of construction paper in half and cutting to create a symmetrically designed tree to help further explain the concept of symmetry. Station 4: Students used iPads to access the Symmetry Lab Basic app. Using the Symmetry Lab Basic app, students drew creative, symmetrical, kaleidoscope-like works of art. This hands-on STEAM focused learning further allowed students to make connections and recognize various examples of symmetry that surround them in letters, words, architecture, and even nature.


Additional free symmetry apps:

Third grade students used iPads when analyzing and comparing images of different community types.  I added a QR Code to a community comparison worksheet for third grade students.  Students worked in teams using the iPad, accessing the QR Reader app, scanning the QR code on the community comparison worksheet, and viewing the library website. Students then worked with their teams to analyze the community images, identify the community (urban, suburban, or rural area), and provide supporting evidence. Using the QR code was an efficient way for all of my students to quickly access the portion of the library website and get started with their comparison and analysis of different

Pourquoi Tales & Narrable, Marcia Mariscal, Goethe Elementary


I chose to have my 6th graders write pourquoi tales as part of a unit I taught on Folk Tales.  They worked with partners making sure there they followed all the literary elements found in pourquoi tales.  I decided to choose narrables.com to publish their pourquoi tales.  Narrables.com is a company that allows you to download images, photos from a camera roll and record a narrable for each picture.  Some of my students drew their pictures on the Doodle Buddy app and others took pictures of their own drawings.  Most of the student’s googled images to support their characters and setting and downloaded those images.  What was great about this project was the collaboration that took place between the students.  They all worked together making sure their story told “why” or “how” their animal, person, or feature came to be as it is today. The hardest part for them, believe it or not, was to record their stories.  They didn’t want to hear themselves retelling the story.  Knowing that they had to share their stories with the rest of the class was even more difficult for them.  Soon they realized the assignment was fun and they got over their reluctance since every group was expected to complete a narrable. 

What was easy about this using narrable was the uploading of images from the iPads camera roll.  The functions in narrable such as resizing of an image, moving an image, deleting an image, and voice recording of the story were user friendly.  When you place play, the narrable moves from one scene to another playing back what was recorded for each scene.  What I found missing in the program was the ability to crop an image.   You can’t also use the iPads to record the narrable.  My students had to finish their project on the MacBook Pro.  Narrable.com is currently working on an app that would allow voice over recording. 


Currently Narrable has a program that is free for teachers.  Teachers can create unlimited solo narrables, view any public narrable, and share narrables with anyone.  They also sell a classroom plan that is $49 a year with student logins, centralized class content, and privacy controls.  There is a 60-day free trial.  I am currently using the classroom plan and I love the ability it gives me to manage the students.  If they forget a password, I can assign one.  All students have to register their username and password under the teacher’s account in order for me to be able to see their work.  My students shared with me that they love seeing the other 6th grade classroom’s projects.  That’s what the program allows.  It functions as one unit, allowing the entire grade level to view each other’s work.

As I heard the students read their pourquoi tales, I saw this as a powerful tool for my ELL students.  They practiced reading their stories over and over until they were happy with their recordings.  They were able to listen to themselves speak the English language.  That allowed for quick grammatical feedback.  It allowed for all my students from diverse learning levels participate in a project that allowed them to be creative.  The visual learners were quick to set up the images that supported their stories.  The auditory learners were able to hear their story as it was set to pictures.  The students collaborated in turning one project in and sharing their project with the rest of their classmates.  Using Narrable.com was very empowering for the students and different from your typical story presentation.  I recommend its usage for any stories that your students are writing and would like to share with their classmates. 
    

Sunday, May 11, 2014

My first round of iPad use is now done, and many lessons have been learned!, Janice Wellborn, Hernandez Middle School

First, a little atmosphere.  My building is a 6-8th grade building.  We are all currently doing high stakes testing and have been doing so for the last two weeks and will continue to do so for the next two weeks.  The first struggle I have been dealing with is just getting permission to use iPads and other technology during the testing period.  To make a long story short, I was able to use iPads and computers last week, but won’t be able to continue until testing ends.

Since my school operates on a block schedule of five weeks, I decided to introduce the iPads during my final week with my kids.  So far this rotation they have already been taught how to use computers to create artifacts using Glogster, Bitstrips, and Animoto.  For their final project I let kids decide which technology they wanted to use for their final project--either any of the three technologies already introduced, or they could choose to largely teach themselves and work with iPads using the Educreations app. Three to eight students in each class decided they wanted to try working with iPads.  Did I tell you I offered this as 10 extra credits points?

While the majority of students worked independently on their projects, the small group of iPadders went at their task with gusto, and more than a few questions. What we found out together is that Educreations is pretty simple to use.  They “saved” pictures onto their camera rolls, selected those pictures for use in their projects, figured out that they had to record their voices to save their projects, and then figured out that once saved, a project could not be edited.  Kind of a bummer, but at least we know now that this is best as a final project rather than an ongoing effort. Since the app was so easy to use, though, we were able to recreate and add to the projects as we went along.  In other words, having to start all over in order to create one perfect product was really not a big deal at all.

While I would not recommend this approach to teaching, since I do like having all the answers if possible, introducing this new app and iPad use was fruitful and not totally frustrating for any of us.  I let the kids know at the outset that I had very little familiarity with the app and that we would be learning together.  I asked them to inform me and each other whenever they discovered something new, and they did!  All in all, it was actually a fun way to teach and learn.

Tuesday, May 6, 2014

iPad Storage @ Volta, Caryn Mikkelsen, Volta Elementary School


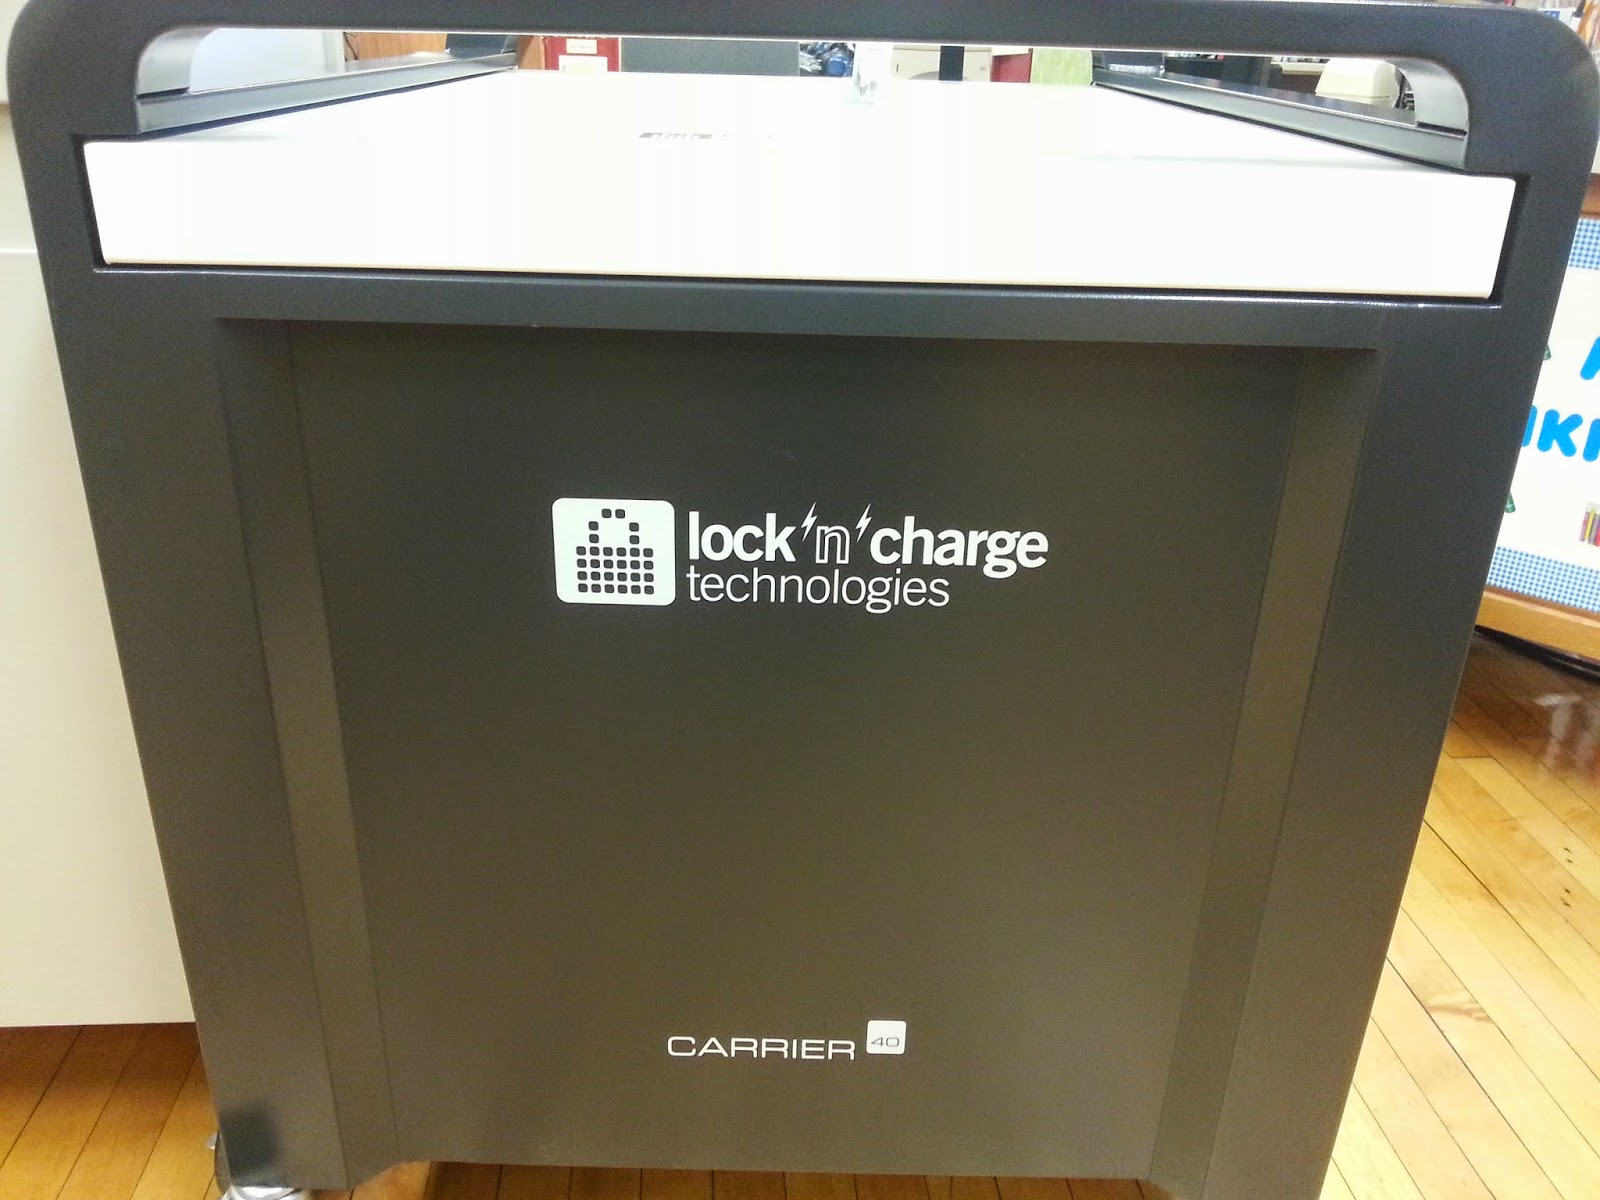
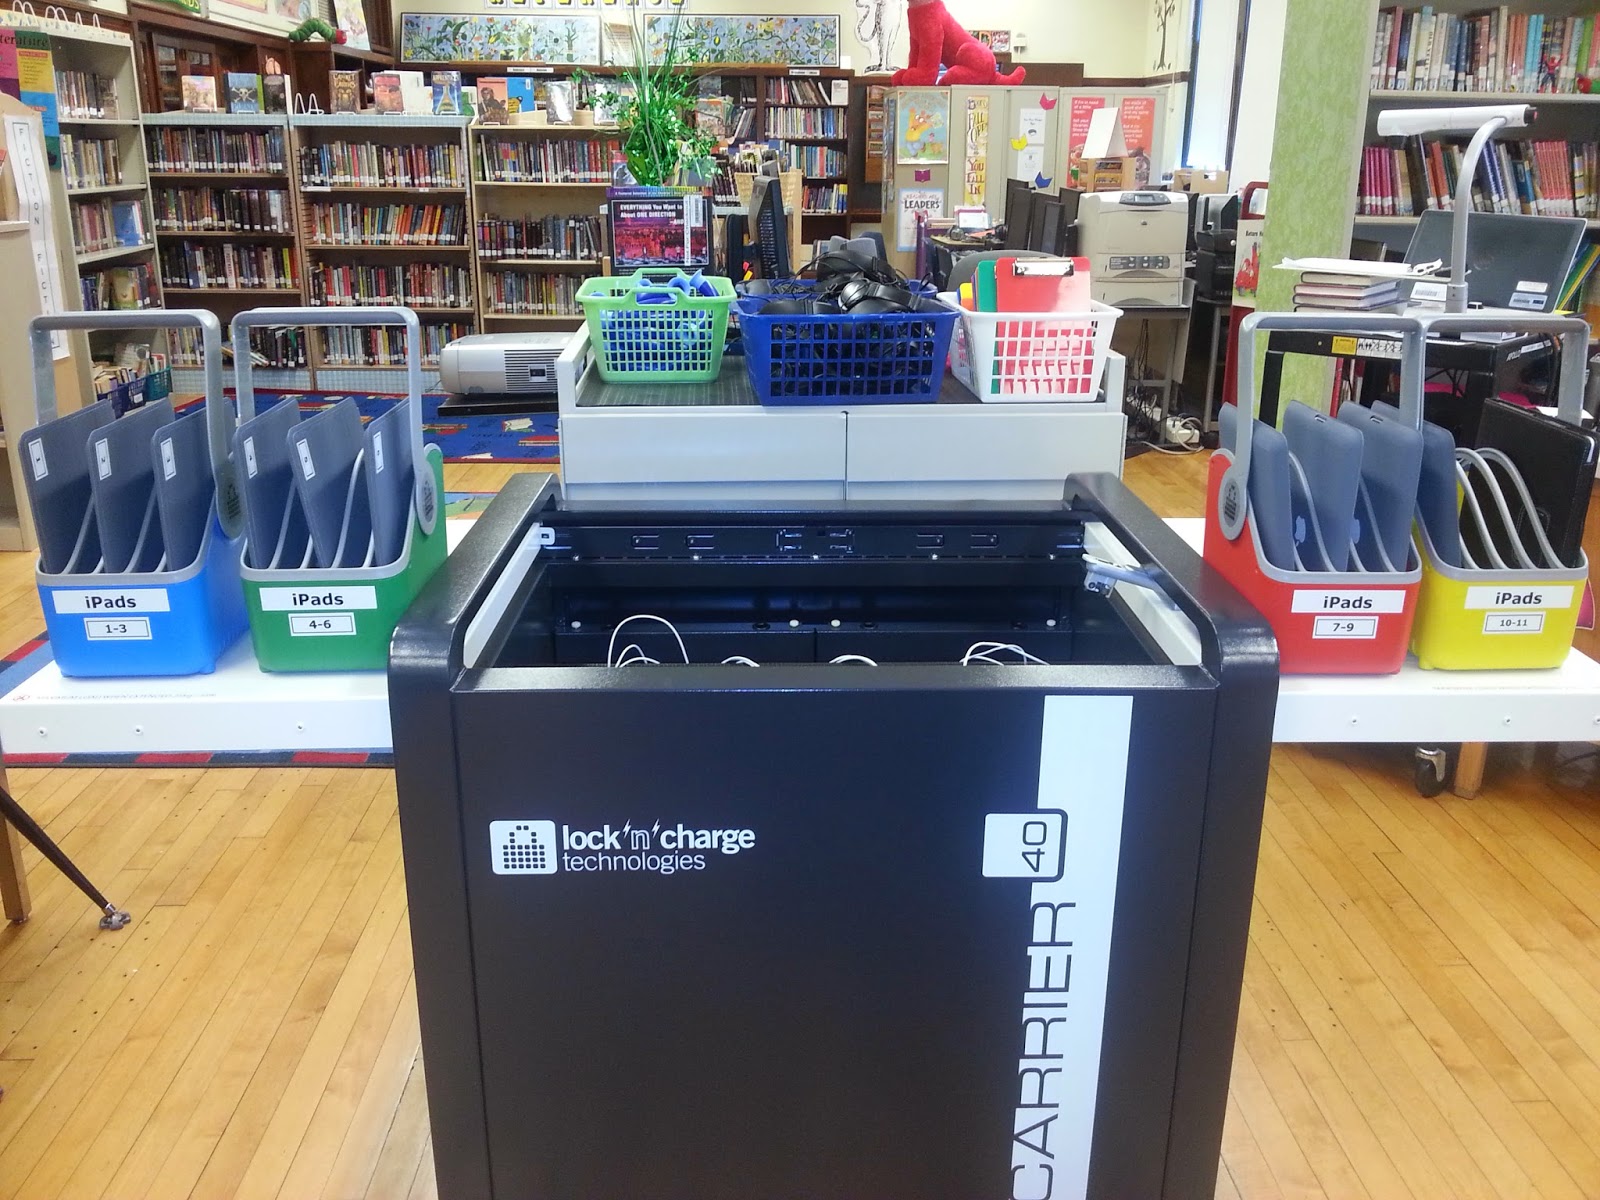
I would like to share how the iPads at Volta are being stored. My iPads are stored in a Carrier LocknCharge cart that I really love! The cart can store 40 devices, (iPads and Chromebooks) and it stores my MacBook. 

Everything in the cart is stored in baskets and the devices are charged right in the baskets. Each basket can hold 5 devices. The baskets are great for management of your devices. I have labeled all the baskets so students can easily pick up their iPad and return it to the proper basket at the end of the class.  It’s also wonderful not having students waiting at a cart for pick ups and returns, I put the baskets on the the tables and students aren’t crowding in one location. It also makes it easy to see if a device has not been returned.


Another great feature is the center strip that holds all the power cords. All the cords fed up from the bottom of the cart. No more tangled cords! I have also 


The cart also came with a remote for setting up a timer for charging.  You can turn power off and on through the remote and also set up how long you want devices charged so over charging does not occur.


When the top of the cart is open you can use the it as a work surface. We are not only loving our new iPads but having this cart makes managing the iPads so easy!


Monday, May 5, 2014

Creating iMovie Book Trailers by Connie Amon, Galileo Elementary School

Fifth grade students revisited favorite (and new!) picture books while creating book trailers for younger students using the iMovie app. When you tap the + sign in iMovie, two choices are presented: new project or new trailer. We used “new trailer” for a few reasons. One of the most important is that there are built in templates and you can find matching printable storyboard templates online:
I prefer these, because they have built in prompts that are helpful:

I started by having the students view examples of book trailers, commercial trailers as well as student-designed trailers. What is the purpose of a trailer? What is commonly included? In small groups, students then selected a book and a theme (adventure, retro, romance, scary, etc.) They were required to provide a statement that explained why the theme they chose was appropriate for their book. This prevented them from all choosing the scary theme (which is quite popular!). It also ensured that students read the book they selected.

Storyboarding is a critical step for any multimedia project, so even though the students are frustrated that they haven’t touched the iPad yet, they are required to complete the storyboard with page numbers or descriptions of pictures and the text they will include. Once the storyboard is completed, it’s a transfer from paper to iPad. Changes are inevitable, but without a plan, the project can quickly digress into confusion. A major lesson we learned is that the place holders in the template cannot be deleted.

My favorite part of this project is viewing day. Even without popcorn, viewing the trailers is a great learning experience as I don’t provide too much instruction on using the app, but rather let students “experiment” on their own. It’s interesting to see what they have figured out, and a great time to have them share their new learning with the rest of the class. “How did you do that?” is a common question. Additionally, the younger students LOVE watching featured trailers in centers and often request the books that are previewed.

Copyright questions abound. The students are required to use pictures from the book, is that acceptable? Is it acceptable as long as the trailers are viewed in-school only? If I include a link to a trailer here, is that a copyright violation? (This is one of my favorites: https://vimeo.com/93997146)

I’m imagining a problem-based research project for next year...

How to get teachers excited about educational iPad applications? by Jean Scheda, Librarian, Westinghouse High School


I recently conducted two iPad PD sessions at my school.  These PD sessions helped familiarize teachers with iPads and some educational iPad applications. My focus was on how students could use these applications for class projects.

The first session is “Educreations.”  Before we started, I asked the teachers to think throughout the session in what way they could integrate this application into their class projects. After briefly introducing the Educreations, I demonstrated how to create a project with Educreations, at the same time, teachers were following along and soon they started experimenting the application on their own or in small groups. I walked around and answered questions. Teachers really love the simplicity of Educreations and think it is a great application for student-created tutorials.

The second session is ‘iMovie.” iMovie is a little bit more complicated than Educreations. I showed a brief PSA I created using iMovie featuring Earth Day, then went over the features, options and editing tools while teachers were creating their own iMovie.  Some teachers were so into it and could not stop until they finished their movie. After the iMovie PD, our Music teacher Ms. Andrews emailed the whole school via Google Group:

Ms. Scheda's PD today on iPad Integration in Class Projects was incredibly inspiring. We have 10 iPads that can yield limitless group project possibilities powered by apps like iMovie, Garage Band, Educreation and others.

During the 2nd PD session we were able to create this gem, utilizing a little Domain 4D: Growing and Developing Professionally- Collaboration and Professional Inquiry. (That may be a stretch.) Starring Ms. Gossler, Ms. Jackson, and myself, with cameos from Mrs. Scheda, and Mrs. Rath.

If we could create this during a PD, imagine what students could do with a little more time!

The photos included are the screenshots of the movie made by Ms. Andrews during the PD session. There were 24 teachers attending the iPad PD sessions.  I think this is a great way to spread the words and increase teacher/librarian collaborative opportunities with iPads.


Friday, May 2, 2014

Events that Changed the World - iMotion Films @ Smyser School, Emily Porter, Smyser Elementary School


The students begin their research online. They work with a partner and save drafts of the script in the Shared Drive. All students at Smyser School use their CPS email accounts. IMG_20140325_151440.jpg

Teaching students to create original content is my favorite part of the digital shift within the world of school libraries. For years, I sponsored History Fair and I became enchanted with using primary sources to drive content within social studies. Teaching students to locate artifacts, letters, and particularly photos activates that intrinsic curiosity within kids. From the research they conduct, they pull all of the resources together and use them in ways I could never have imagined. IMG_20140401_151456.jpg


I have been teaching documentary film making with 7th & 8th grade students.  So quite a few of my students have learned to visually tell stories using primary sources. They know how to conduct interviews. They can edit and attach sound files to projects. Then, last summer I learned to make stop-action films using iMotion. The app was only available for iPads so it wasn’t until we were awarded the REVITAL grant that I was able to truly design a unit integrating iMotion into the research projects and implement it with my students here.

The following photos document the process of my students creating Smyser’s first stop-action films. I have to say, I am pretty pleased with the results!


As their research is finalized, they begin to draft a script about the events they learned about. Important details for the script include developing characters who actually participated in the incident, picking a setting that is authentic, and developing dialog that includes the facts - dates- etc… so that the audience learns the details and significance of the event.  
                                                                                                       
The students use storyboardthat.com to organize the scenes that will be created with the props and materials the kids bring from home.

IMG_20140325_151423.jpg
I allow students quite a bit of freedom when it comes to the materials they bring to make the iMotion films. Most choose to create 3D sets out of dolls, Legos, and action figures. Some like to draw and create characters from construction paper and sketches. A big part of our class discussions focus on intellectual property, copyright, usable/free media, and creative commons media. Some very robust discussions have evolved from teaching kids about these concepts.


IMG_20140326_150239.jpg


However, most kids find drawing characters laborious and bring their props from home. I store the materials from them in the library so they don’t have to drag supplies back and forth from home or lockers.

Now for the FUN part….

IMG_20140326_150108.jpg


Legos, stages, and action figures….


IMG_20140326_150225.jpg
Barbies…


… And then they film, using iMotion.IMG_20140401_151430.jpg